Creating Custom Dashboards
See what you want to see, how you want to see it! With Customer AI’s Custom Dashboard, you can add, move, and remove widgets to display the exact reports and metrics your team needs. It’s your most important data - at a glance!
What can I do with my Custom Dashboard?
Oh, so many things! But we’ll just list our top contenders:
- Create multiple dashboards to segregate data - This is especially useful for teams or projects that may benefit from different views.
- Personalize each dashboard - Select the most relevant widgets for your company’s needs.
- Organize your data in a way that makes sense for you - Widgets can be placed anywhere on the dashboard grid in an easy-to-read format.
Note: We’ll continue adding widget options to make your life easier without disrupting your existing dashboards.
Getting Started
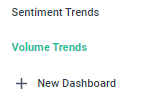
Though you may change or delete these at any time, you’ll automatically be set up with two default dashboards. Click the dropdown menu next to Dashboards to view the Sentiment Trends Dashboard and the Volume Trends Dashboard.

- The Sentiment Trends Dashboard, by default, includes:
- Net Sentiment Score
- Net Sentiment Score Change
- Net Sentiment Score Chart
- Most Negative Topics
- Most Negative Topic Groups

- The Volume Trends Dashboard, by default, includes:
- Conversation Count
- Conversation Count Change
- Conversation Count Chart
- Most Mentioned Topics
- Most Mentioned Topic Groups
- Top Trending Topics
- Top Trending Topic Groups
 Remember: You can edit or delete these default dashboards at any time. More on that below.
Creating your New Dashboard
- Click on Dashboards at the top left, under Insights.
 2.From here, you may choose Sentiment Trends or Volume Trends to start from one of our default dashboards, or click + New Dashboard to start from scratch.
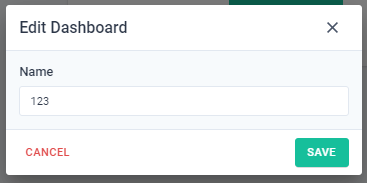
3. If you click New Dashboard, a popup will appear. Name your new dashboard, then click Create.

4. From here, you’ll be prompted to Add a Widget.

5. Click + Add Widget to see a full list of metric options.
The Widgets are broken up into 4 categories: Conversations, Sentiment, Topic Groups, and Topics. Within each category, you’ll be able to pick from 3 associated widgets.
Remember, you can add as many (or as few) widgets as you’d like to your Custom Dashboard!
Conversations
- Conversation Count - Total volume of Conversations
- Conversation Count Change - How that volume has changed
- Conversation Count Chart - Visual representation of Conversation Volume
Sentiment
- Net Sentiment Score - Difference between the % of positive and % of negative conversations
- Net Sentiment Score Change - How that difference has changed
- Net Sentiment Score Chart - Visual representation of the difference between % positive and % negative conversations
Topic Groups
- Top Trending Topic Groups - Topic groups with the highest volume change in comparison to the previous period
- Most Mentioned Topic Groups - Topic groups with the highest volume
- Most Negative Topic Groups - Topic Groups with the lowest Net Sentiment Score
Topics
- Top Trending Topics - Topics with the highest volume change in comparison to the previous period
- Most Mentioned Topics - Topics with the highest volume
- Most Negative Topics - Topics with the lowest Net Sentiment Score
Note: Remember that all data reflected in the dashboard is based on the date range and the filters you have selected.

6. Add widgets to heart’s content!
Managing Your Dashboards
Things change. We get it! In this section, we’ll show you how to modify or delete your dashboard.
To edit the name of your dashboard
- Click Edit Dashboard at the top right.
 2. Rename your dashboard. Click Save.
Organize your widgets by simply dragging and dropping them on the grid!
 To remove a widget
- Hover over the top right corner of the widget you’d like to delete. Three dots will appear.
- Click the dots, and a Remove Widget button will appear. Click Remove Widget.
 To delete a dashboard
- Click on the three dots at the top of the dashboard.
- Then click Delete Dashboard.
 That’s it! Your data, your dashboard. Happy Playvoxing!